Doing Spring Cleaning? BPL Archives Department Tips on Preserving Old Photos
 |
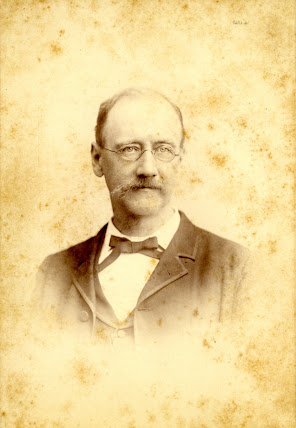
| Photo of George P. Collins |
 |
| Photo from 1893 Alabama-Auburn football game. |
By Don Veasey| Curator of Photographs, BPL Archives Department
Not everyone is blessed to have some old family photographs. Maybe you have a collection of old views of a city. Maybe you have acquired some "instant ancestor" photos at an antique store.
Old photos can be a mixed blessing because they do require some care so that they can be enjoyed for as long as possible. If the condition of the photo is good, you want it to stay that way. If they are faded, silvered, flaking, cracked, bent or broken, you do not want them to get any worse.
Even if a photograph looks perfect, the damage that can lead to deterioration may be at the microscopic level.
Photographs are rather picky -- they do not like to be too hot, too dry, too wet, in bright light, dusty or (EEK!) moldy. Unlike a printed sheet of paper, photographs are made up of layers. The image is not printed on paper, the image is a layer that is applied to a paper backing.
For example, if a photograph curls inward, dryness has caused the image layer to shrink and the paper is more stable; if a photograph curls backward, the image layer has too much moisture and has expanded. And either of these conditions can lead to cracking.
You might ask, "Alas! I pray of thee, what can I possibly do for I, a mere layman, am undone and pitifully inexperienced and sorely uneducated in these matters of great consequence?"
Well, I'll tell you! There are a few things you can do that will help!
1. DO keep your hands clean. DO NOT allow food or drink around photos or negatives.
2. DO handle photos only by the edges or better still. DO hold them from underneath or even better DO handle them as little as possible. But DO NOT touch the surface and DO NOT hold a photograph between your fingers and make it bend.
3. DO NOT EVER let fingers touch image surfaces. DO wear white cotton gloves if possible. Negatives, slides and transparencies usually have one side that is more shiny. The duller or matte side is the image side; the side to make sure to avoid touching. The shinier side is the “front” for viewing purposes.
4. DO use a soft, camel-hair brush for GENTLY cleaning dust, dirt and grit from photographs and negatives. DO be careful not to scratch the image side of the negative.
5. DO NOT use self-adhesive or magnetic photo albums.
6. DO NOT use scotch tape, glue, rubber bands, thumb tacks, glued on photo corners, or use metal or plastic paper clips on photos or negatives. ALL can cause irreversible damage.
7. DO NOT display photos in direct sunlight; color photos are especially susceptible to fading and discoloration. Even in indirect or dim lighting a photograph will soon begin to fade. It is better to make a copy, photographically or digitally, for display.
8. DO NOT label photos with a pen. Ink can soak through the paper. It is best to label the photo on the page of the album but if it is necessary, label on the reverse side of the photo along the back of the margin using a soft-leaded pencil. DO NOT press hard when writing. CAUTION: the pencil marks will rub off eventually; it will be necessary to rewrite the information.
9. DO label your photos: who, what (building or event), where, when.
10. If you frame a copy of a photo, DO NOT put glass directly against a photograph when framing it. DO use spacers or a mat of acid-free board to separate the photo from the glass. Also, DO use acid-free backing materials when framing photographs but do not mount the photo. Instead, "museum mount" it to the back of the acid-free matte.
11. DO NOT photocopy (Xerox) photos. Digital scanners can be used to copy photographs. This is permissible because the image can be stored, which can negate the need for future handling of the original item. Image software can be used to enhance images. Copies are easily printed. Some scanners are equipped for scanning negatives and transparencies but make sure a scanner can accommodate the negatives’ sizes.
12. DO use acid-free paper, acid-free photo corners, or polyester sleeves or pockets to fasten photos into albums or onto bulletin boards. These are available from archival supply businesses. Identifying information can be written on paper sleeves and folders. To avoid pressure marks, DO remove the item before writing on the folder/sleeve
NOTE: broad-headed tacks can hold a photo in place on a bulletin board without puncturing it.
13. DO store photos in a sturdy box of painted metal or acid-free cardboard. DO NOT use wood or regular corrugated cardboard boxes.
14. When storing photos in boxes they should be filed in acid-free folders and stored vertically--DO NOT stack them flat. The box should not be packed tightly yet should not be packed so loosely that the folders flop over and bend without support.
15. DO store photos in a safe, dark and a moderately dry place. DO NOT KEEP THEM IN THE ATTIC, GARAGE OR BASEMENT!
Those who want to dig deeper into the care of photographs may want to read the book Conservation of Photographs by George T. Eaton.
(These suggestions were compiled using information from the Alabama Department of Archives and History and the International Museum of Photography.)
Comments